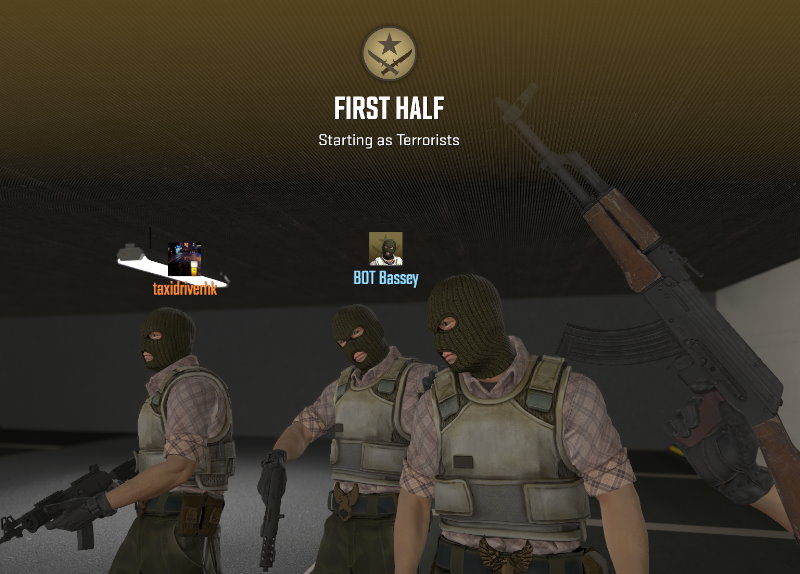
Play your own addon/workshop map
Updated on 2023-12-26
Valve published an update to enable playing Workshop/addon maps without any hacks.
Once you build the map from Hammer, simply launch the default CS2, open the console and use the command below to play the map.
map_workshop <workshop-id> <map-name>
<workshop-id> is the addon name used when you created the addon from the Workshop Tools, while <map-name> is the name of the .vmap file you created. CS2 should be able to autocomplete both the ID and the name for you.
By default, the map will be launched in Competitive mode. If you want to launch the map in a different mode (e.g. Casual),
then use the following commands to set the relevant parameters before executing the map_workshop command.
game_type <type-number>
game_mode <mode-number>
Refer to this table for a list of possible game types and mode numbers.
============== Ignore the section below if you have already installed the latest version of CS2 ==============
Introduction
By default, the map your built from Hammer would only be available from the CS2 launched as part of the Workshop Tools. It will not be available in the normal/release version of CS2.
There are some steps that we need to take in order to play the map from CS2 in the same way as other official maps. Hopefully we don't have to take these steps as CS2 is getting more mature in terms of features.
Preparation
The map generated by Hammer has an extension of .vpk, which is just an archive of build artifacts.
In order to decompress and compress .vpk files, you would need to download 7zip with a VPK format provider.
- 7-Zip: Download Link
- VPK Format Provider: Download Link
Build and extract the map
Build the map as usual, once the build succeeds, a <your-addon-map-name>.vpk file should be generated under the directory
<your-drive>:\\SteamLibrary\steamapps\common\Counter-Strike Global Offensive\game\csgo_addons\<your-addon-map-name>\maps.
Copy <your-addon-map-name>.vpk to a temporary directory of your choice, then extract the files as shown below.

You will notice that the archive has everything except for materials.
If you load the map right now, the textures will not render correctly as they are not even found.

Put in the materials and compress
Under the temporary directory where you extracted <your-addon-map-name>.vpk, create a new directory called materials.

Find the compiled materials (not the ones you saved as .vmat as they are intended for development use only) from the directory
<your-drive>:\\SteamLibrary\steamapps\common\Counter-Strike Global Offensive\game\csgo_addons\<your-addon-map-name>\materials
From there, you will see a bunch of .vtex_c files, copy all of them (except for the folder named default) to the materials directory
you created under the temporary directory earlier.
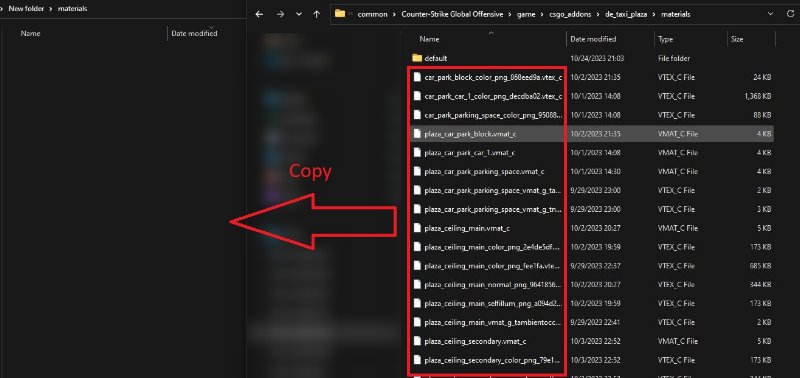
Go back to the temporary directory, select the two directories materials and maps,
right click for the context menu, and select 7-Zip, followed by Add to archive.
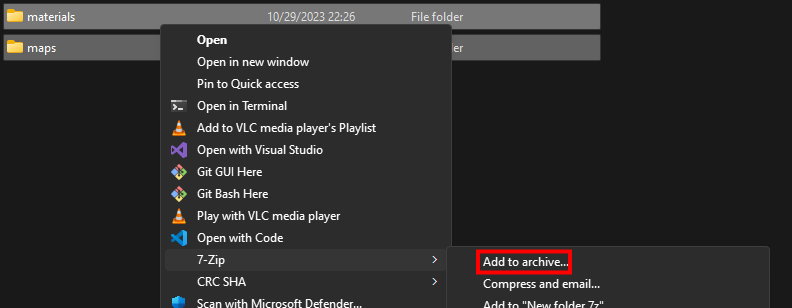
A dialog should show up, make sure the following are selected:
- Archive:
<your-addon-map-name>.vpk - Archive format:
VPK - Compression level:
Store
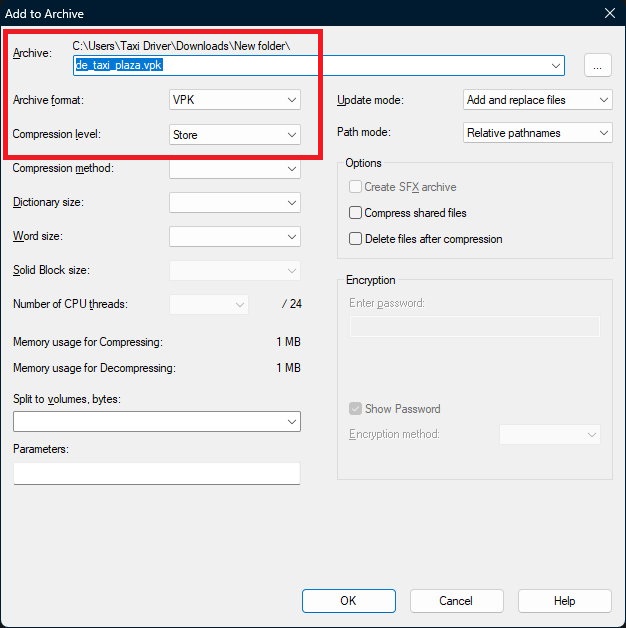
A new <your-addon-map-name>.vpk should be generated, put it to the directory
<your-drive>:\\SteamLibrary\steamapps\common\Counter-Strike Global Offensive\game\csgo\maps.
Play the map
As of now, CS2 does not allow loading non-official maps by default. We have to bypass the blocker by creating a shortcut to launch CS2 with special options.
Make a shortcut of the application Steam on your desktop, then go to Properties by right click.
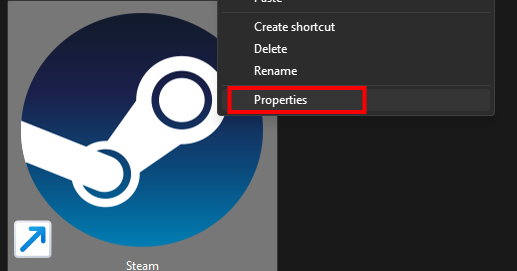
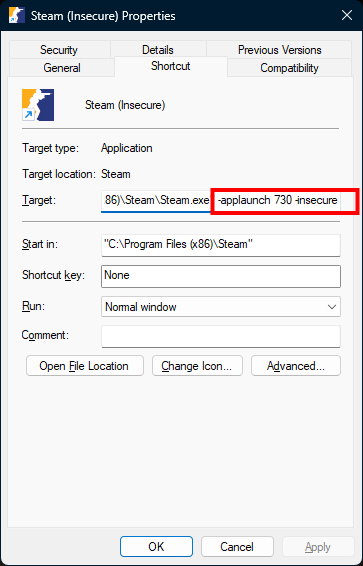
Add the string -applaunch 730 -insecure at the end of Target.
You could also change the icon by browsing the file
<your-drive>:\\SteamLibrary\steamapps\common\Counter-Strike Global Offensive\game\bin\win64\cs2.exe.
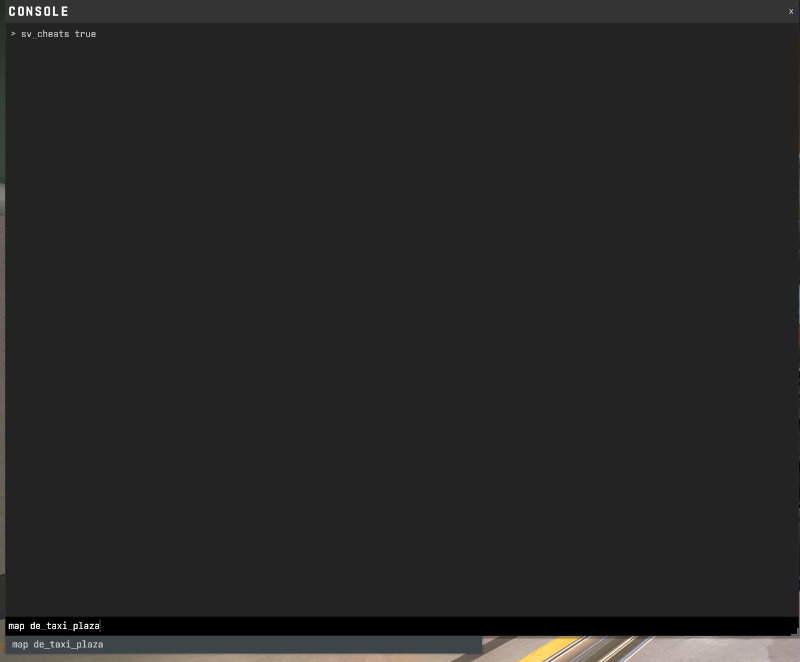
Launch CS2 using the shortcut, open the console with key ~, then type the following commands.
If everything is setup correctly, the console should auto-complete the map name for you.
sv_cheats true
map <your-addon-map-name>
The map should now be loaded with textures, it's time to enjoy!
